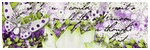
Grab My Blinkie

OBSESSED FORUM

I CT For


Blogs I Love


Thursday, June 6, 2013

Tutorial was written for those that have a working knowledge
of PSP
Any resemblance to any other tut is purely coincidental.
Please do not copy it in anyway, do not resize it or claim
it’s as your own.
Material:
PTU tube from Alex Prihodko which can be bought at PFD
Font: Alex Brush
Tutorial:
New 650x650 image, white background
Open cluster frame and resize by 90%
New raster layer, pick up the color form the frame and fill
up the layer
(my color is: #4ba6d2)
(my color is: #4ba6d2)
Select inside the frame, selections, modify expand by 7
Select the new layer with color, selections invert, delete
Select the new layer with color, selections invert, delete
Open the tube and position to your liking. Add shadow.
Duplicate the tube and position under the frame on the right and blend mode luminance
Erase the part that are not under the frame
Duplicate the frame, mirror it an position so green palms are visible behind the tube
Duplicate once more and put the frame up so the blue flowers are visible on the top of the main frame.
Erase the rest of the frame.
Duplicate the tube once more and position under the frame on
the left, blend mode luminance
Add copyright and name
Animation
Add copyright and name
Animation
I used animation by Simone named Simoneani413
Open in animation shop
Open in animation shop
Go back to psp and go to edit, copy special, copy merged
Go to AS and paste as ne animation
Duplicate the layer 17 times,has to 17 frames
Go to AS and paste as ne animation
Duplicate the layer 17 times,has to 17 frames
Edit, select all
Select animation, edit select all, copy
Go to tag frames, and edit paste into selected frames
Save as gifSelect animation, edit select all, copy
Go to tag frames, and edit paste into selected frames
Subscribe to:
Post Comments
(Atom)
About Me

My Blog List
-
Misfits Christmas Goodies - Ok I asked our members to come up with some new Christmas goodies and they surely have just done that and more. Thanks so much to Basima, Mary, Anne, Chris...

-
Purrfectly Spooky PTU - Okay, ladies... you know I *had* to do a kit just for the black cats! 🖤🐾 *Purrfectly Spooky* is all about those whiskers, paws, and that little touch of ...
-
-
Countdown to Christmas: Dec 19 - Dec 21 - Request a Custom Order and get any Premade Blog Design from SHOP! for free. *From December 19 - December 21 BUY 1 - GET 1 FREE. * All info - HERE. ♥

-
AUTUMN FALL - DOWNLOAD '4SHARED' HERE DOWNLOAD 'MEDIAFIRE' HERE [image: post signature]


0 comments:
Post a Comment